
An overview of Unity and the initial setup method are described in the knowledge below. These make Unity available.
Then, in this knowledge, As part of how to create 3D computer graphics contents and games with Unity, we describe how to execute and operate objects with Unity.
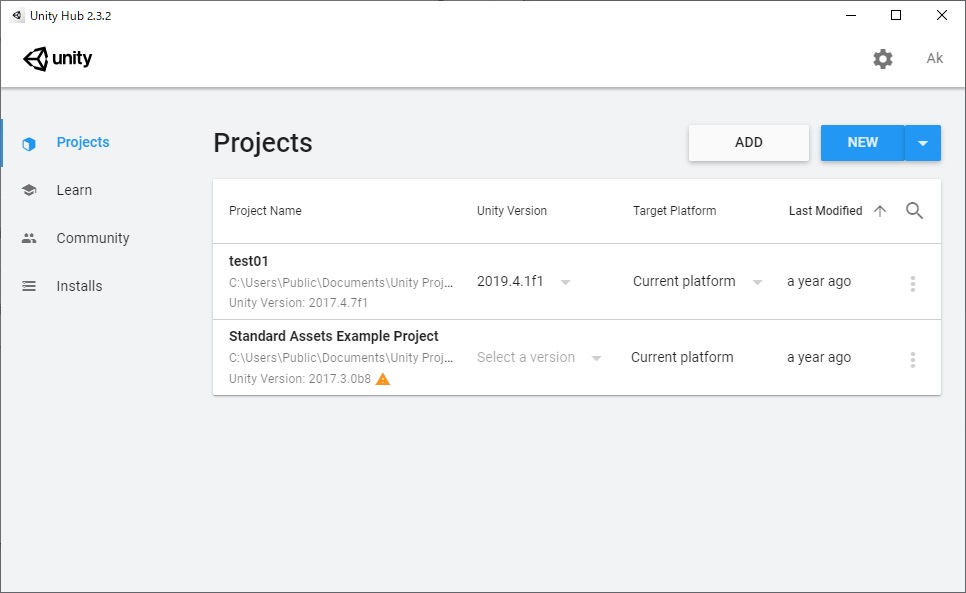
How to start Unity & how to create a project
- Since Unity starts from Unity Hub, start Unity Hub.
- If you are starting for the first time, you need to create a project. Click “NEW” at the top right of the “Projects” screen of Unity Hub.
- A project is a collection of everything related to games and 3DCG content.
- If the Project has already been created, click the Project name to start Unity.
Source : Unity Hub
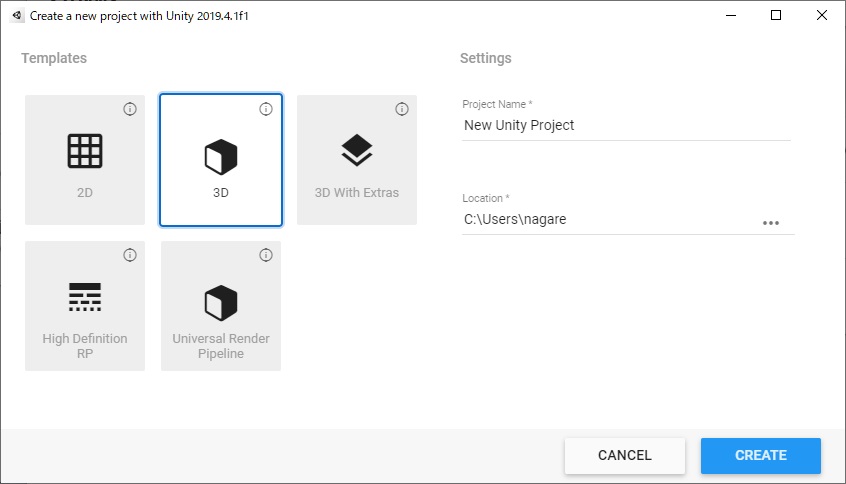
- If you want to create 3DCG, select “3D”.
Source : Unity Hub
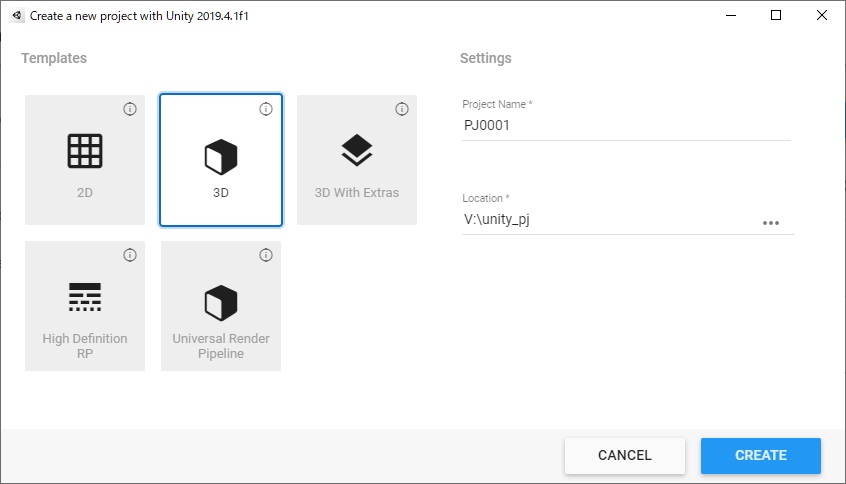
- Enter “Project Name” and “Location” and click “CREATE”.
Source : Unity Hub
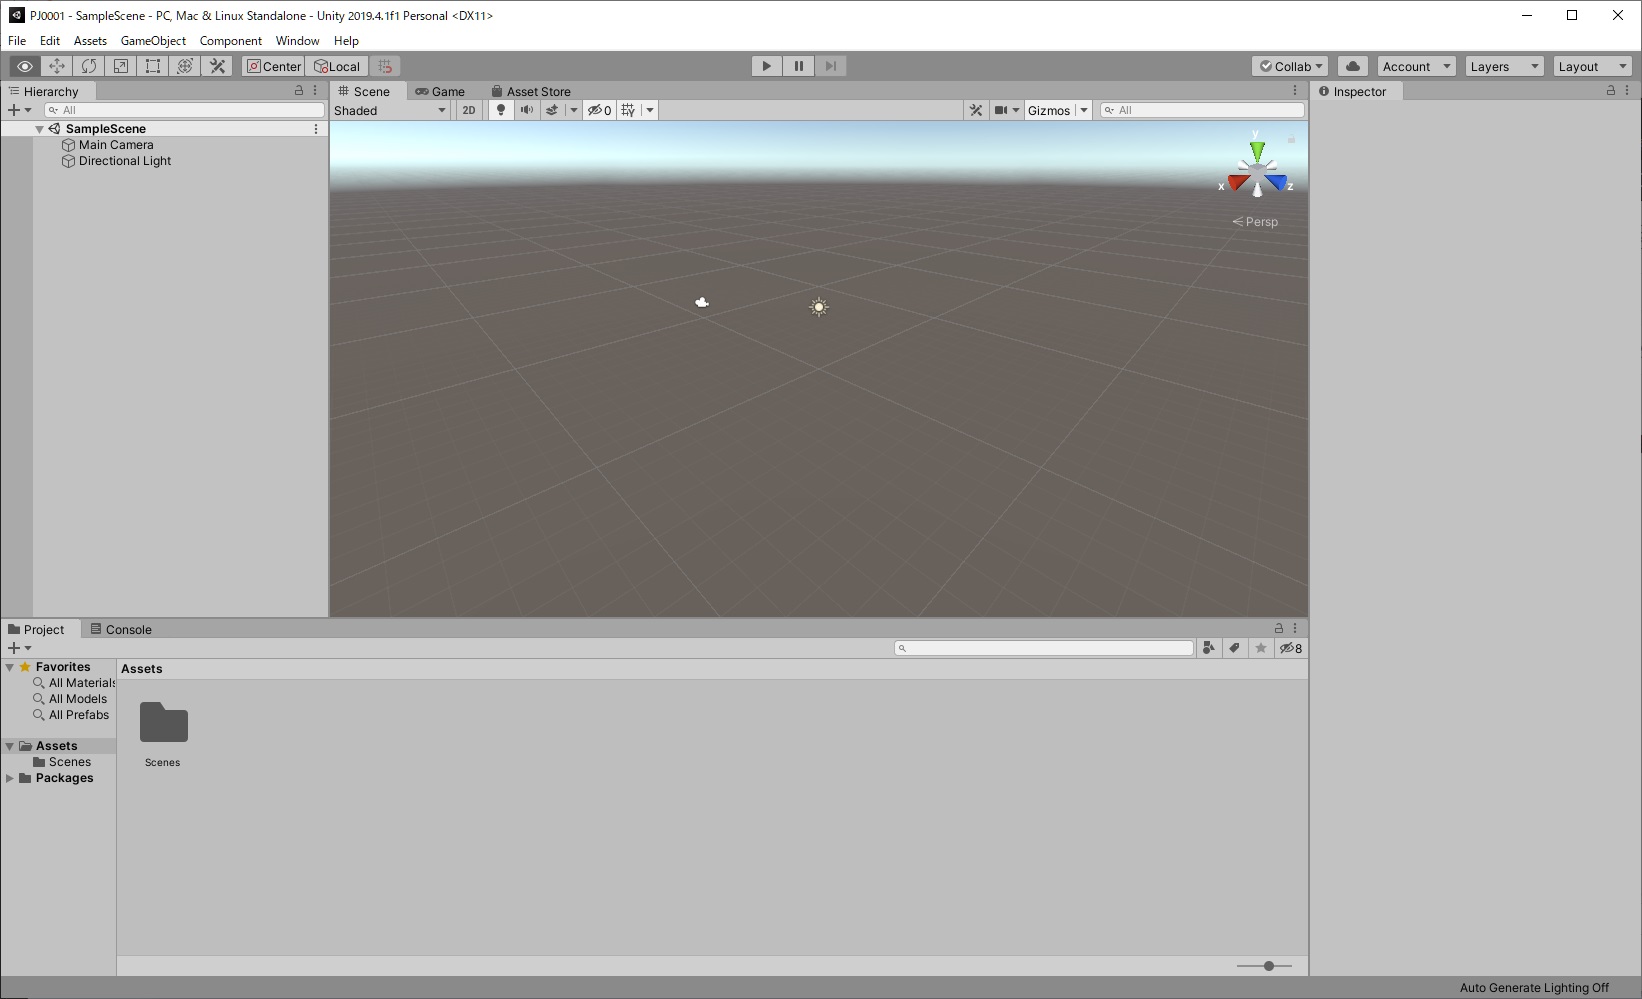
- Unity starts and the Unity Editor is displayed.
Source : Unity
How to create an object
As an example of object creation, create a cube of 3D object.
- Click “+” in the “Hierarchy” window at the top left of the screen, then click “Cube” in “3D Object”.
Source : Unity

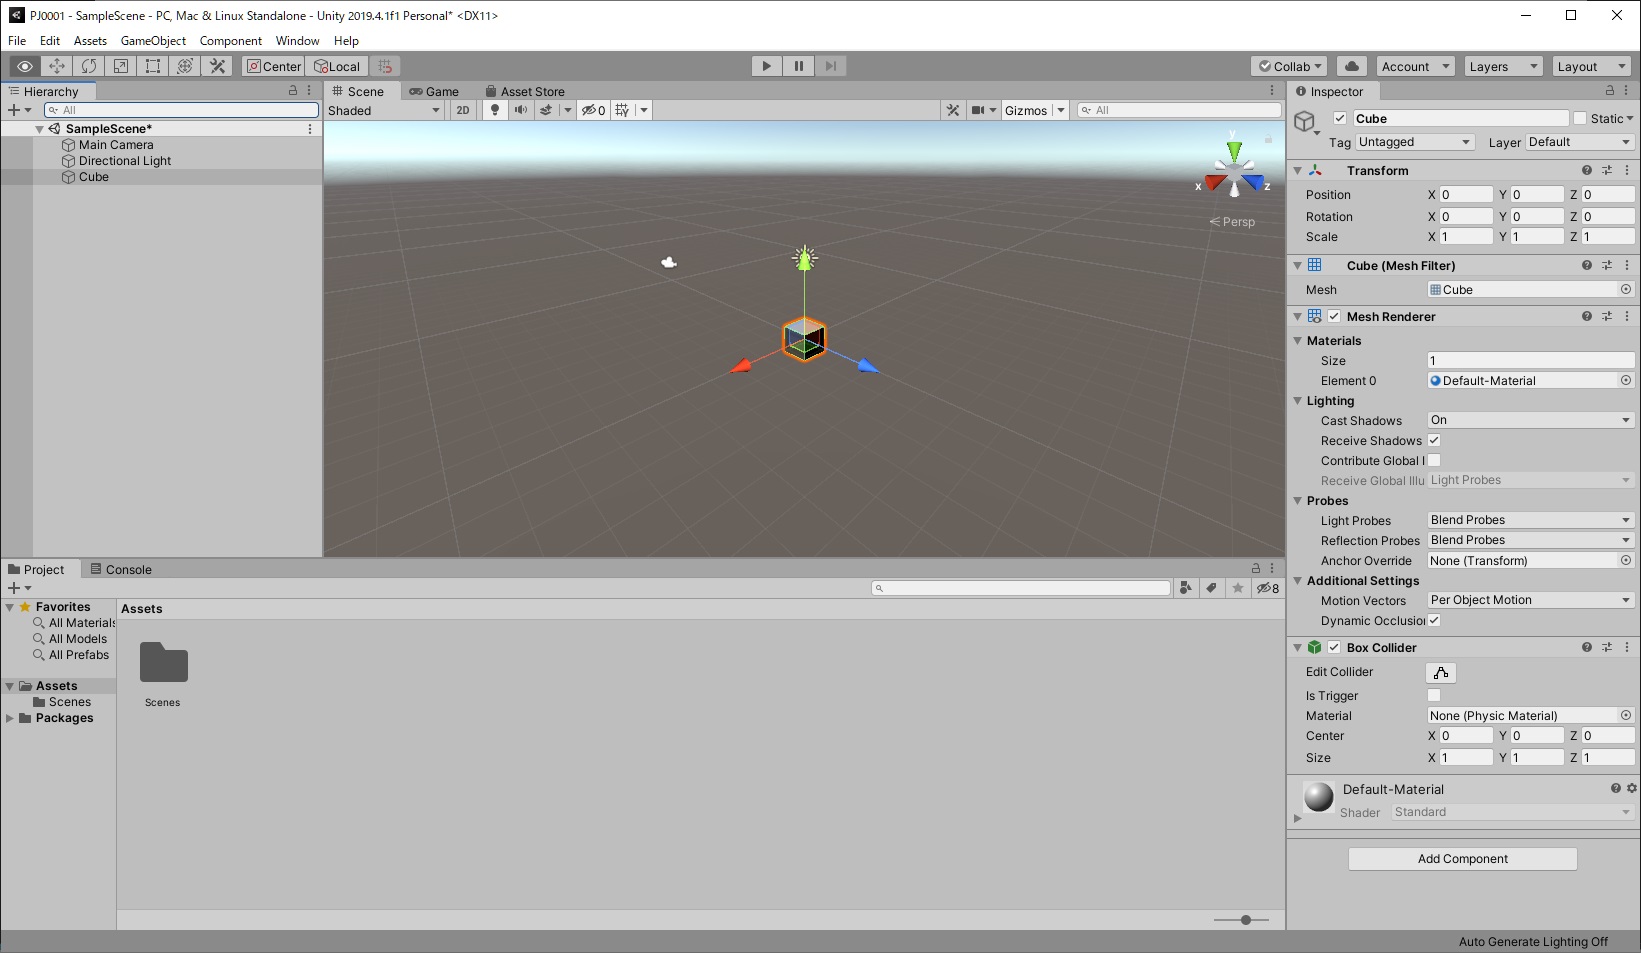
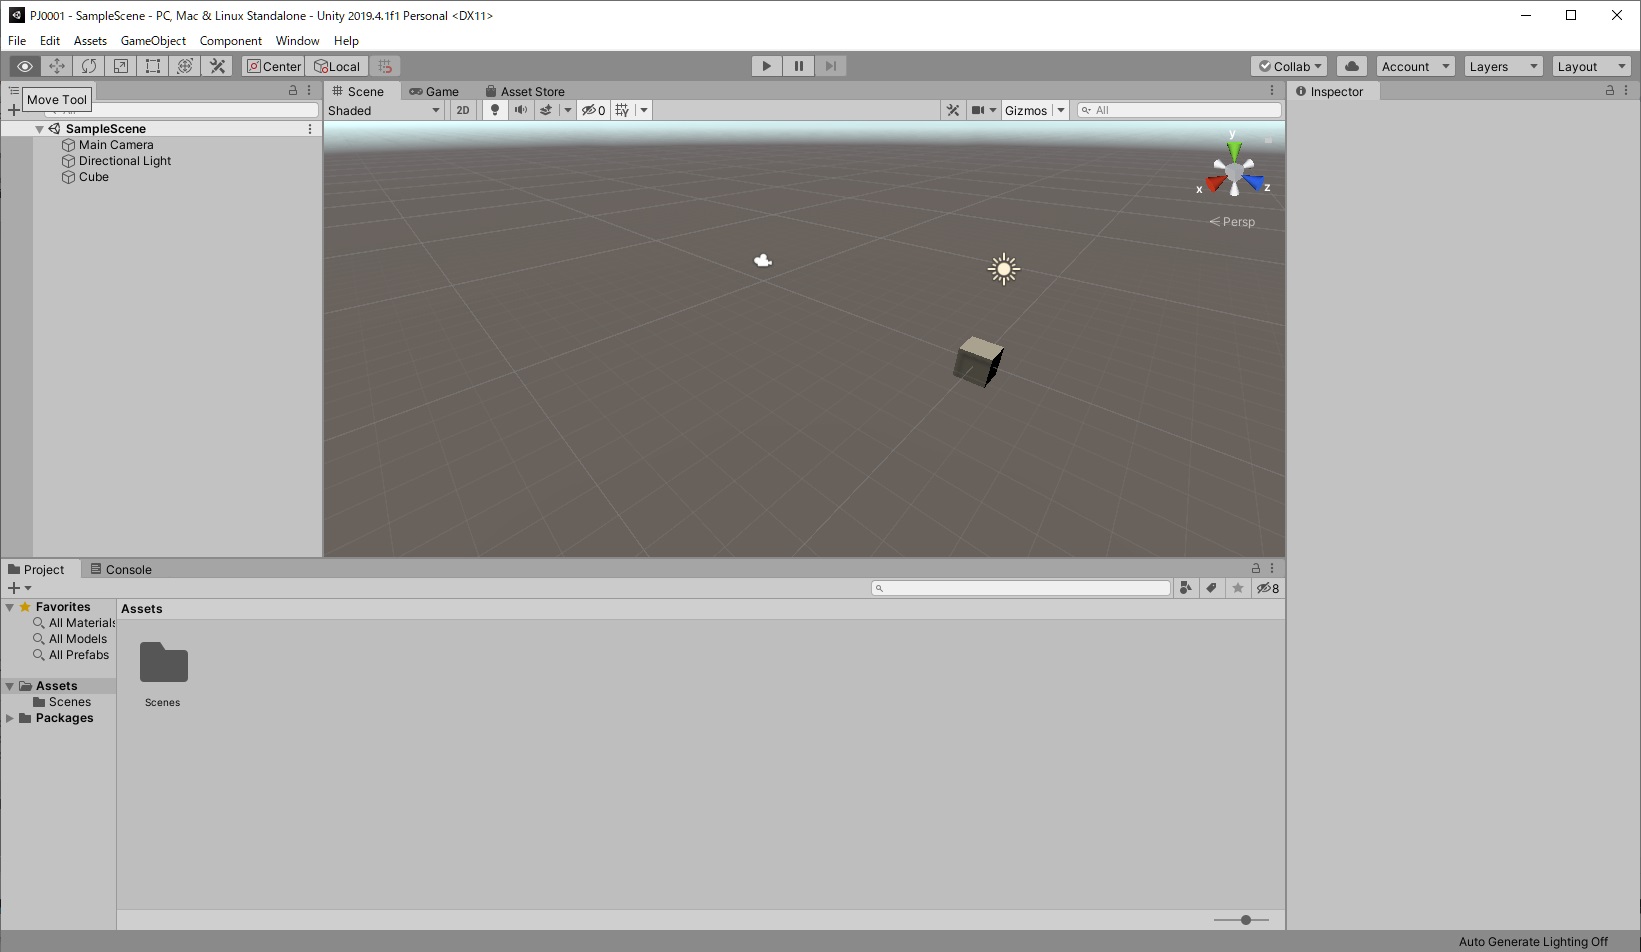
- “A cube is created in the center of the “Scene” view.
- Click on the cube and “Inspector” will be displayed on the right side of the screen.
- You can check the coordinates of the current object in “Position” of “Transform”.
- Immediately after creating the object, all XYZ coordinates are 0.
Source : Unity
Check camera and lights
Even if you don’t create an object in Unity, you can see two objects in the scene view in the center of the screen.
The object at the top center is the light, and to the left is the camera.
Lights illuminate a three-dimensional space. The camera captures and projects a part of the three-dimensional space.
Source : Unity
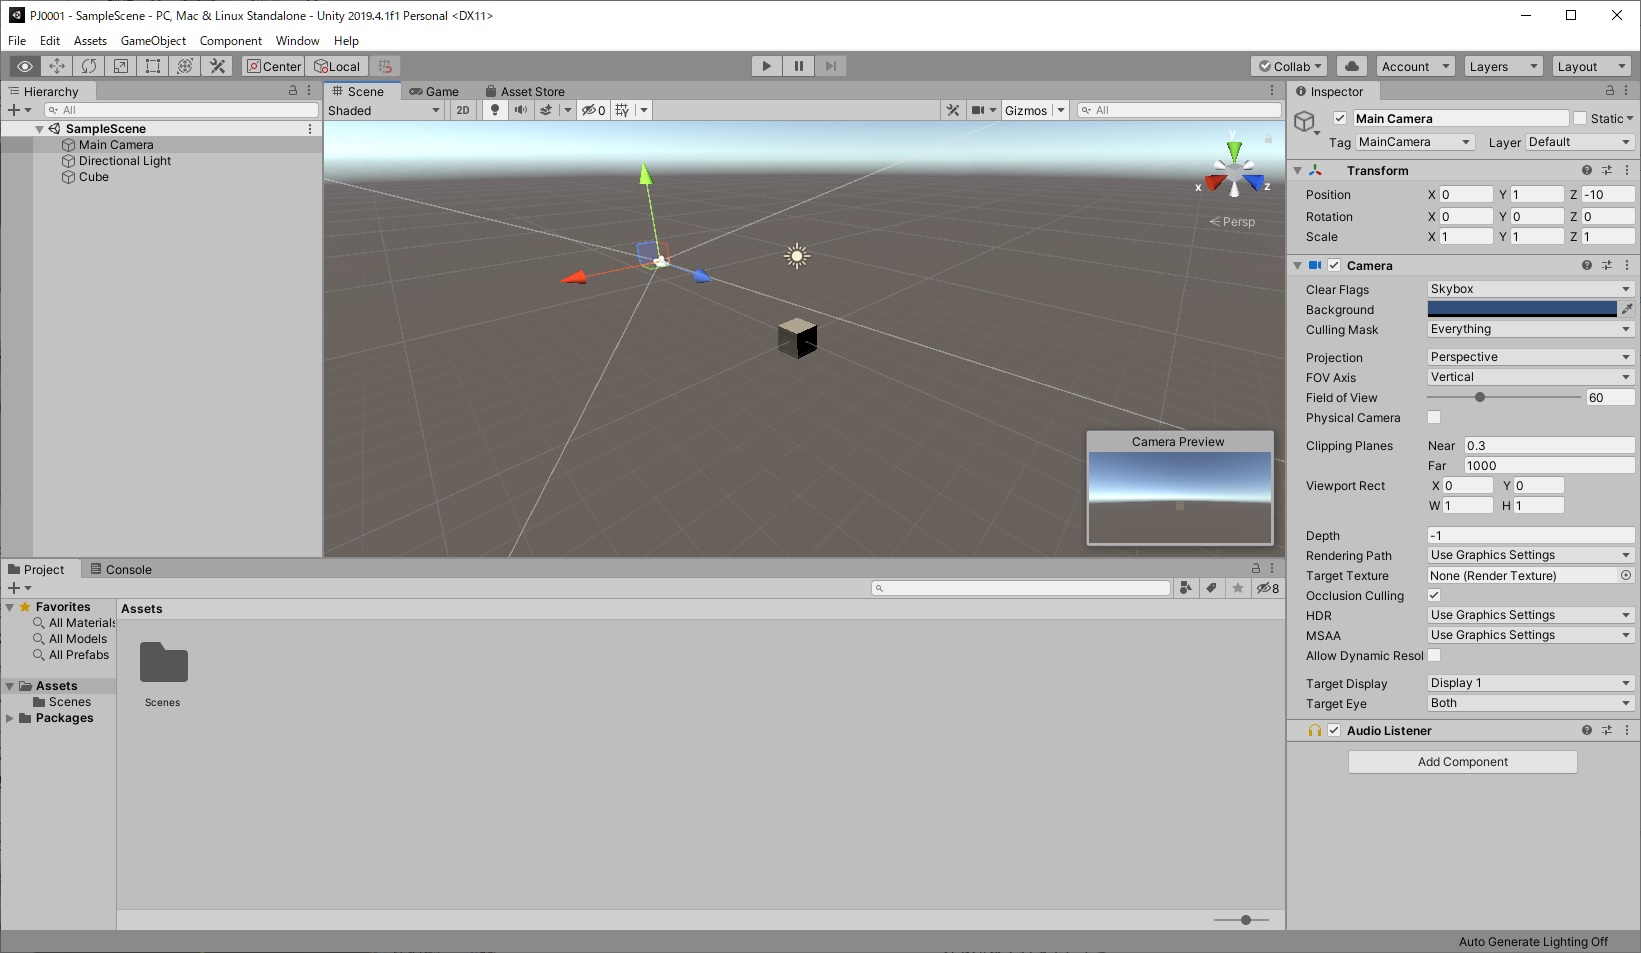
Check the coordinates of the camera and light.
- Click “Main Camera” in the “Hierarchy” window on the left.
- You can check the coordinates in “Position” of “Transform” item of “Inspector” on the right side.
- The initial coordinates of the camera are “X: 0, Y: 1, Z: -10”.
- The coordinate system of Unity3D is the left-handed system. Therefore, the Y-axis 1 means that the camera is floating in the air.
- For the light, click “Directional Light” in the “Hierarchy” window and do the same.
Source : Unity
How to run a project (game)
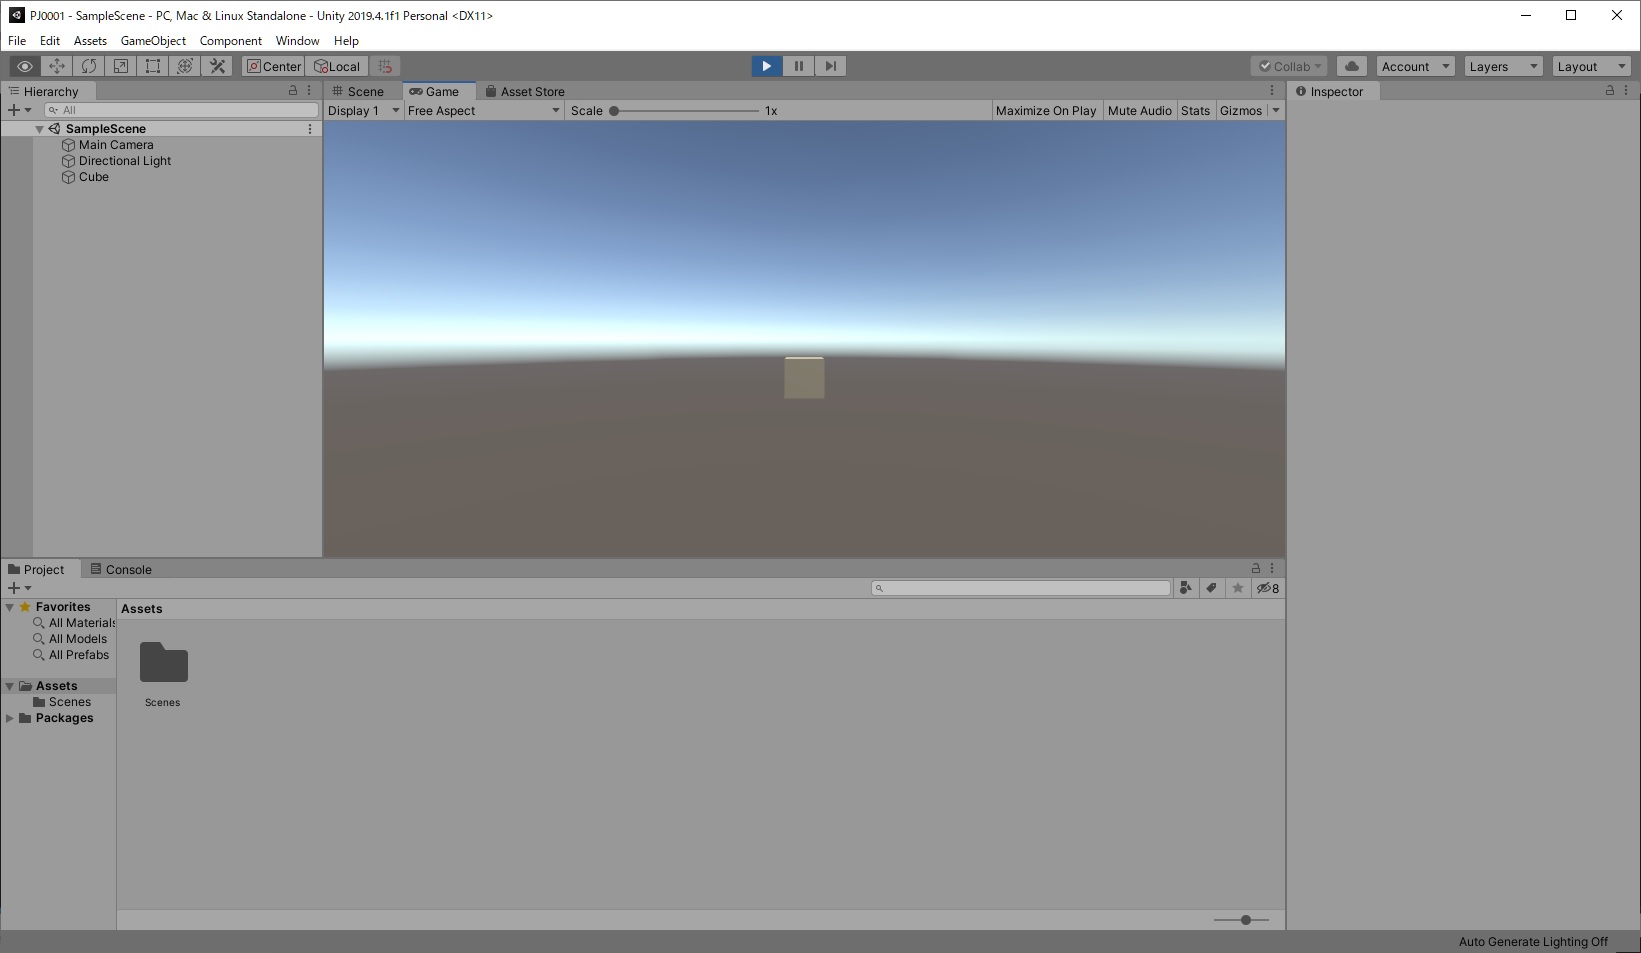
- Click the execute button (horizontal triangle mark) in the execution tool at the top center of the screen.
- The part that was the “Scene” view in the center of the screen changes to the “Game” view.
- The cube created from the viewpoint of the camera is displayed. As a result, you can see the cube seen from the side.
- If you run the project after moving the camera closer to the subject, the subject in the “Game” view will appear larger.
- The buttons next to the execute button are the pause button and the frame advance button.
- Click the Run button again to exit the “Game” view.
Source : Unity
How to save a scene
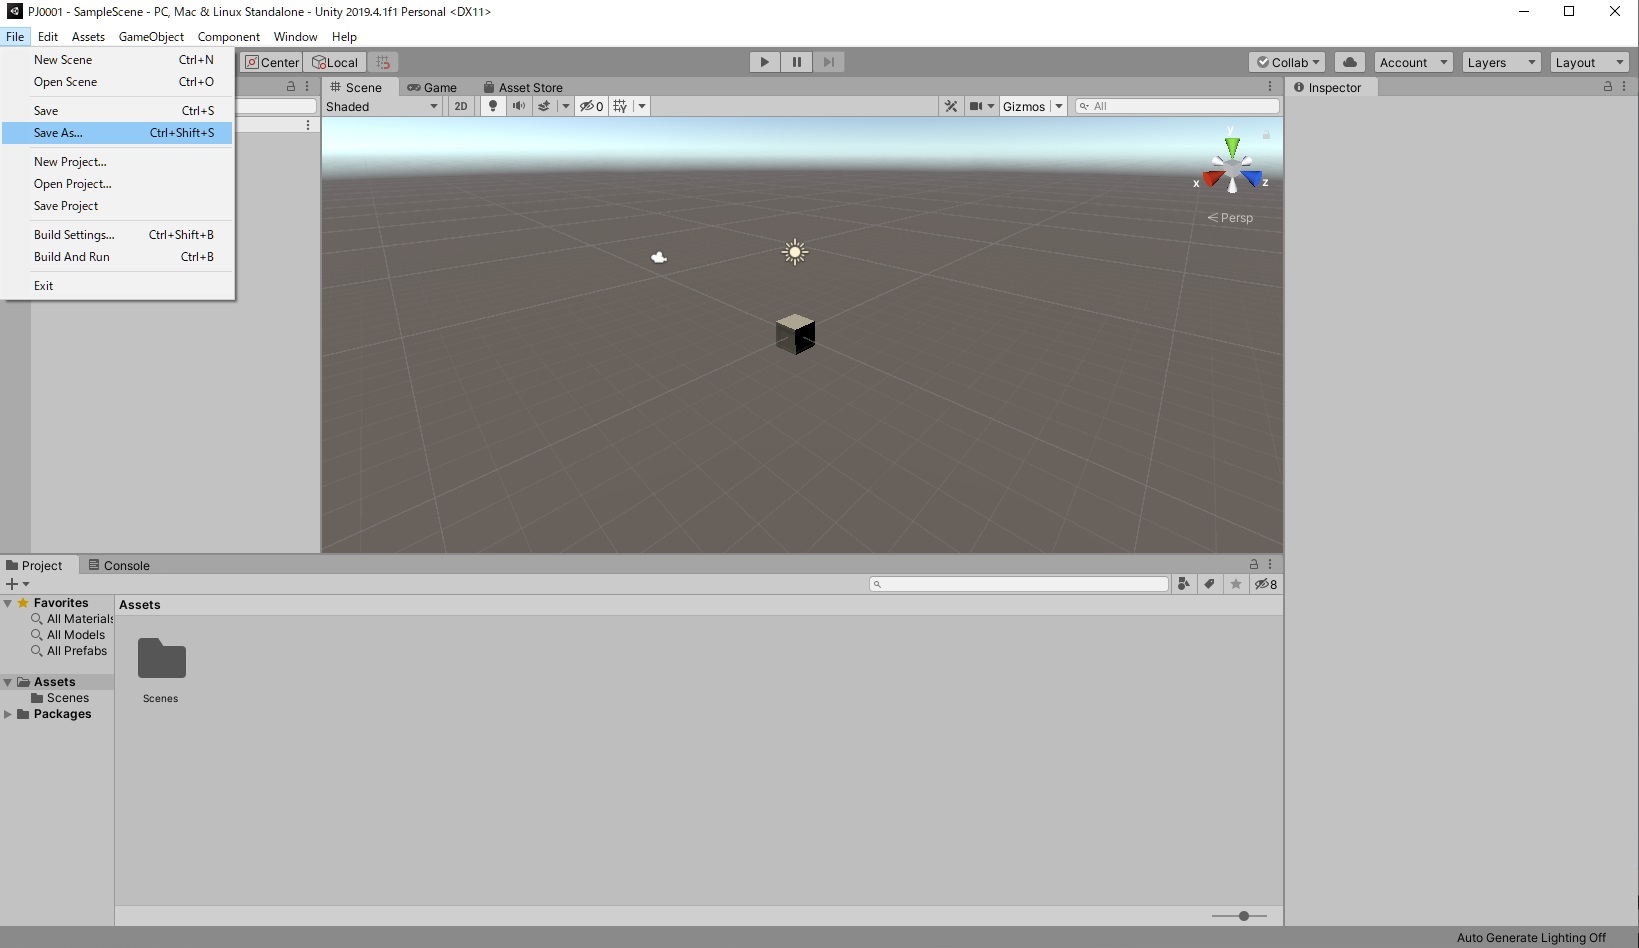
Save the scene confirmed by execution.。
- Click “File” – “Save As…” in the menu.
Source : Unity
How to operate the viewpoint of the scene view
When creating 3D CG content, it is convenient to operate the viewpoint of the “Scene” view.
The operation method is described.
- Zoom in, Zoom out
- Rotate the mouse wheel of the mouse.
- Translation
- Hold down the middle mouse click and drag.
- Or, click the screen movement tool with the hand mark in the operation tools on the upper left of the screen. Left-click and drag somewhere on the “Scene” view.
- Rotation
- Right-click and drag. During this operation, the hand mark changes to an eye mark.
- By clicking on each XYZ axis of the scene gizmo (red, blue, green colored object) in the upper right corner of the “Scene” view, you can change the viewpoint according to each axis.
- X-axis (red): Viewpoint from the side
- Y-axis (green): Viewpoint from directly above
- Z-axis (blue): Viewpoint from the front
Source : Unity
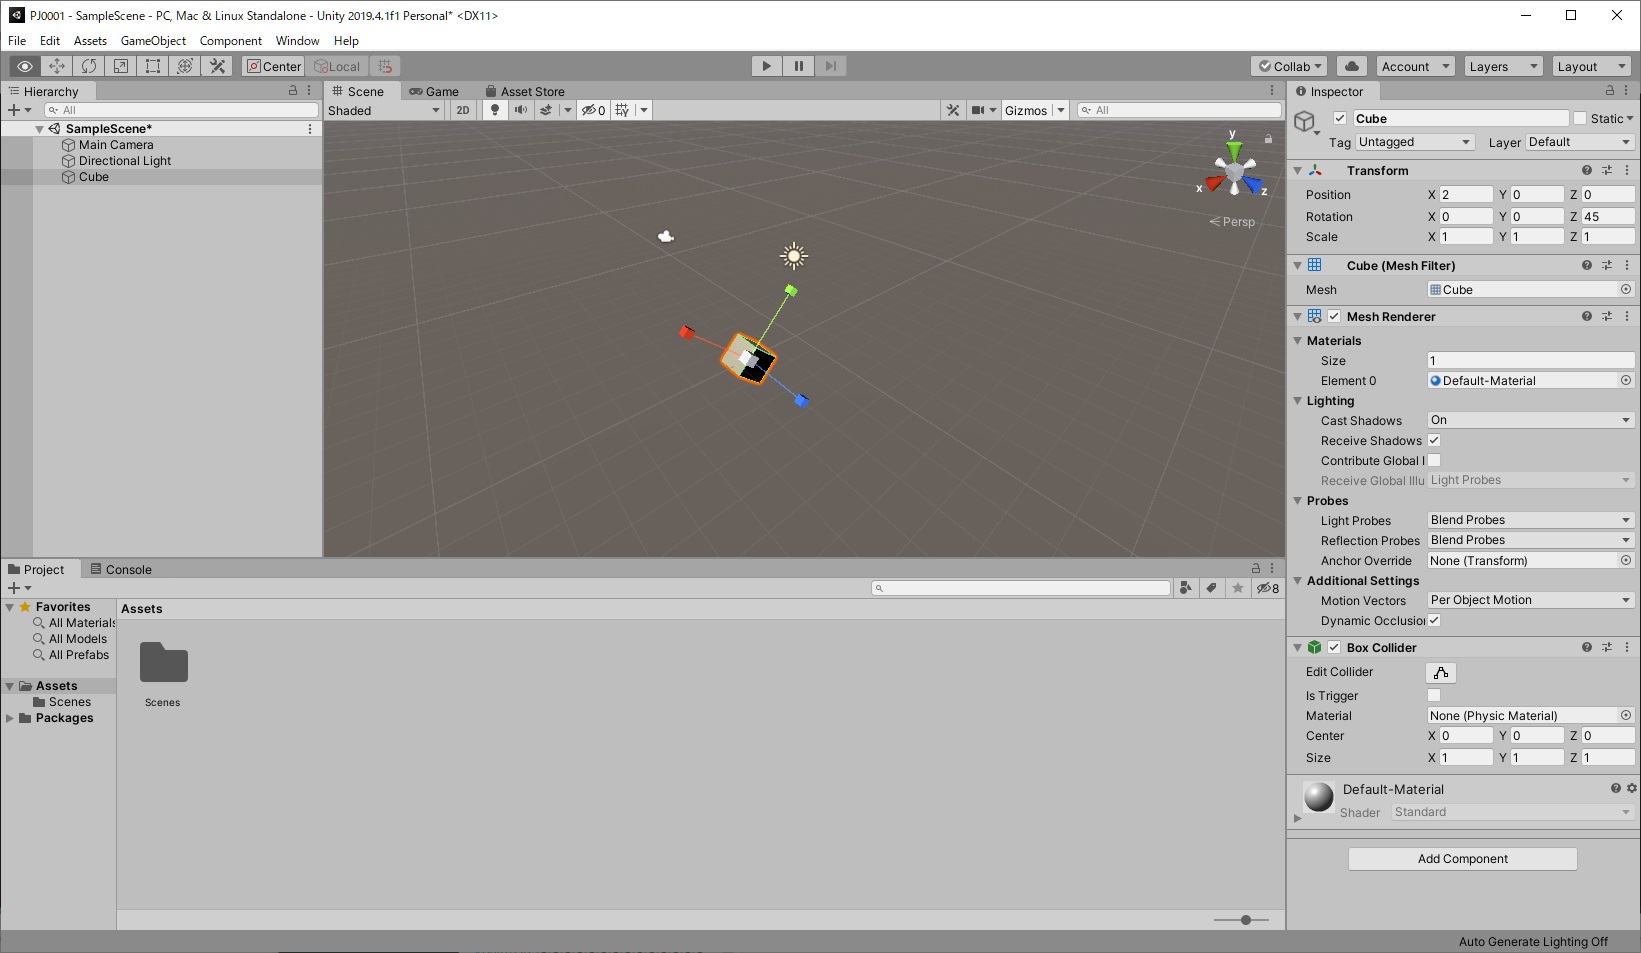
How to operate an object
- Move object
- Select the move tool that is the second from the left among the operation tools in the upper left of the screen.
- Click the target object in the “Hierarchy” window.
- In the example below, select “Cube”.
- A 3-axis arrow is displayed on “Cube”. Red can be moved on the x-axis, green on the y-axis, and blue on the z-axis.
Source : Unity

-
- Drag while clicking the arrow of the axis you want to move. The object can be moved by this operation.
- It can be seen that when the object is moved, the value of “Position” in the “transform” item of “Inspector” also changes. Objects can also be moved by changing this value directly.
Source : Unity

- Rotate object
- Select the rotation tool that is the third from the left among the operation tools in the upper left of the screen.
- Click the target object in the “Hierarchy” window.
- In the example below, select “Cube”.
- Three circles are displayed in “Cube”. Red can be rotated around the x-axis, green around the y-axis, and blue around the z-axis.
Source : Unity

-
- Click and drag the circle. You can rotate the object with this operation.
- It can be seen that when the object is rotated, the value of “Rotation” in the “transform” item of “Inspector” also changes. Objects can also be rotated by changing this value directly.
Source : Unity

- Object enlargement / reduction
- Select the enlargement / reduction tool that is the 4th from the left among the operation tools in the upper left of the screen.
- Click the target object in the “Hierarchy” window.
- In the example below, select “Cube”.
- A 3-axis line is displayed on “Cube”. Red can be scaled on the x-axis, green on the y-axis, and blue on the z-axis.
Source : Unity
-
- Drag while clicking the square at the tip of the axis you want to enlarge / reduce. The object can be enlarged / reduced by this operation.
- You can scale the entire object by clicking and dragging the center cube.
- It can be seen that when the object is enlarged / reduced, the value of “Scale” in the “transform” item of “Inspector” also changes. Objects can also be enlarged / reduced by changing this value directly.
Source : Unity
