Google Cloud Platform (GCP) でシステムを作る際、IaaSである Google Compute Engine (GCE) を利用したいケースが多々ある。
IaaSはユーザ管理領域が広く、サーバとして自由にカスタマイズ出来る。
そこで、本ナレッジではそのGCEの作成手順を記載する。
また、GCPの利用開始準備が整っていない場合は、以下ナレッジを参考に利用開始準備を実施する。
Sponsored Links
Google Compute Engine (GCE) の無料枠
GCEのマシンタイプは構築したいシステムを踏まえ、スペックと価格を鑑みて選択する。
一方で、GCEをまずは試してみたい場合や、スペックを求めない使い方をする場合は、無料で利用できるGCEもある。
無料で利用できるGCEの条件は以下に記載されている。
条件をまとめると以下となる。
- マシンタイプ: e2-micro (2021/8まではf1-micro)
- インスタンス数: 1
- リージョン:
- オレゴン: us-west1
- アイオワ: us-central1
- サウス カロライナ: us-east1
- HDD: 30GBまで
- 外部IP:
- 本インスタンスに利用される外部IPも無料
- ネットワークトラフィック :
- 1 GB の北米から全リージョン宛ての下り (外向き) ネットワーク
- スナップショット: 下記リージョンにおいて月 5 GB まで
- オレゴン: us-west1
- アイオワ: us-central1
- サウス カロライナ: us-east1
- 台湾: asia-east1
- ベルギー: europe-west1
Google Compute Engine (GCE) の作り方
以下にプロジェクトの作成手順を記載する。
- 以下のURLにアクセスし、GCPへログイン。
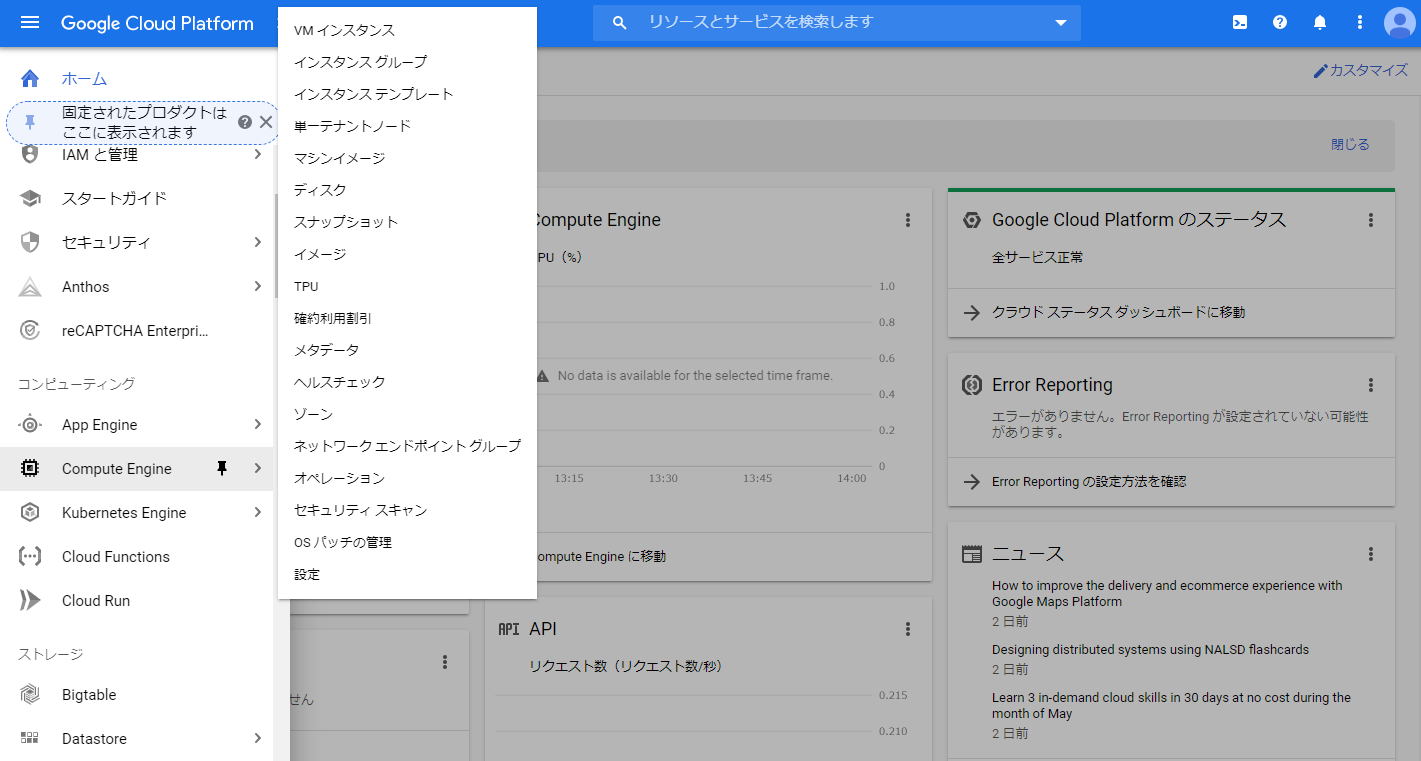
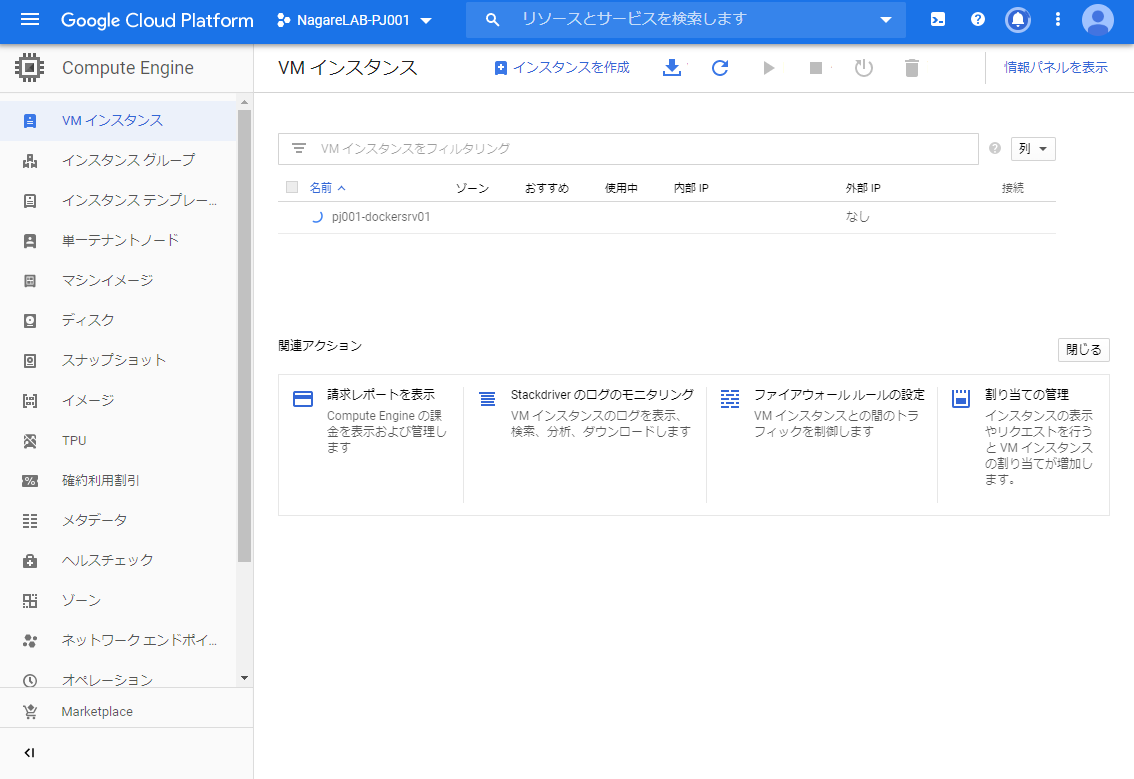
- ポータルサイトの左メニュー内の ”Compute Engine” 項目の ”VM インスタンス” をクリック
Google and Google Cloud Platform™ are trademarks of Google LLC and this website is not endorsed by or affiliated with Google in any way. - 初回アクセス時、 ”Compute Engine” の準備完了まで1分ほど待つ。

Google and Google Cloud Platform™ are trademarks of Google LLC and this website is not endorsed by or affiliated with Google in any way. - 画面内の ”作成” をクリック。
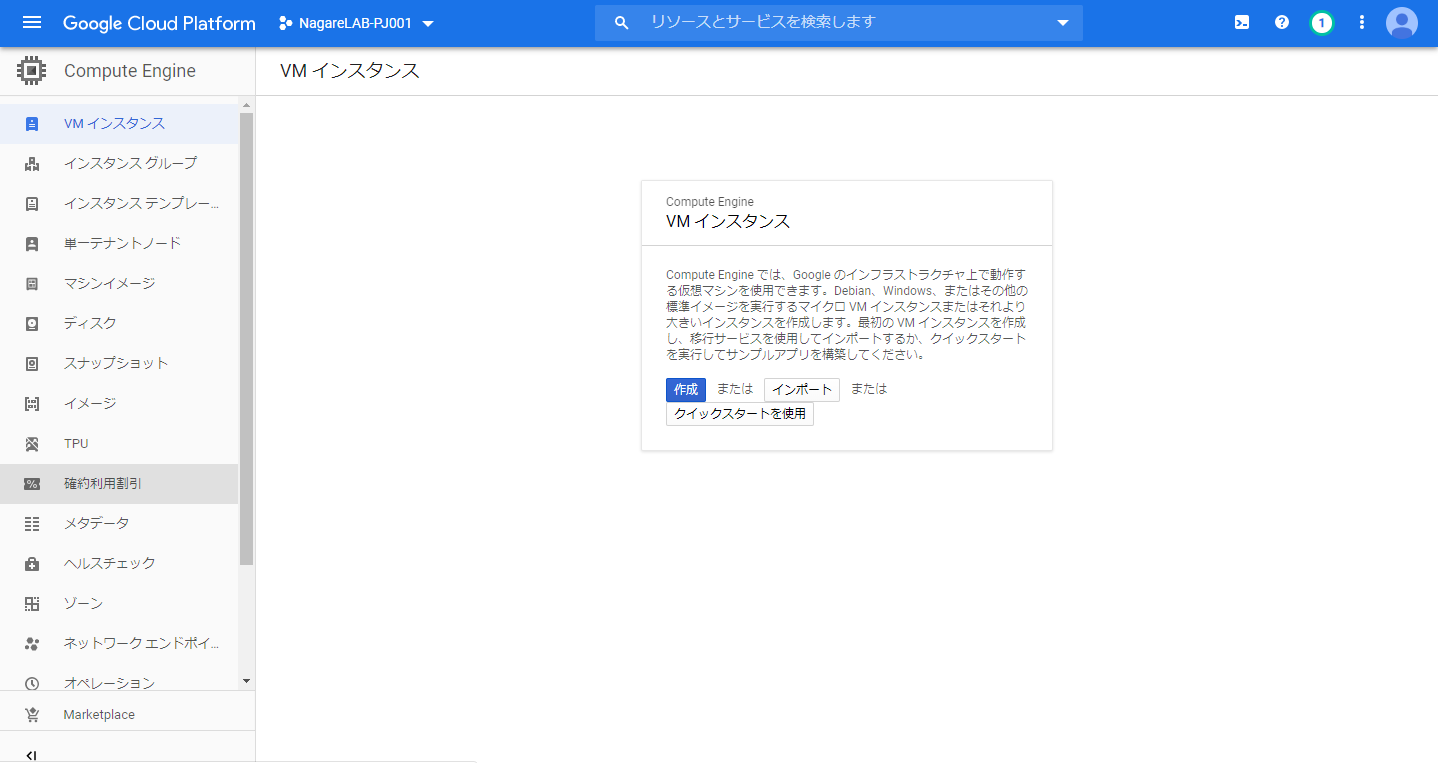
Google and Google Cloud Platform™ are trademarks of Google LLC and this website is not endorsed by or affiliated with Google in any way. - インスタンス作成画面が表示される。

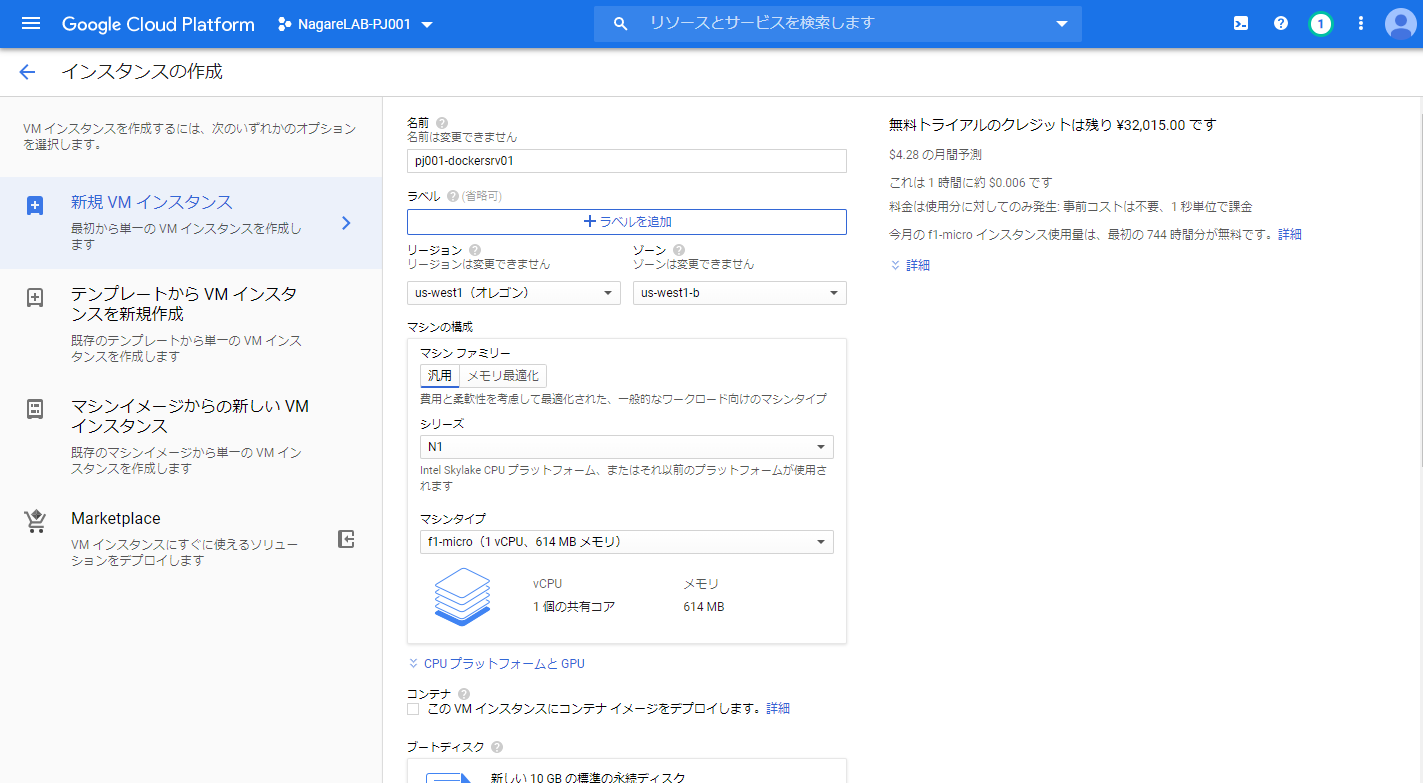
Google and Google Cloud Platform™ are trademarks of Google LLC and this website is not endorsed by or affiliated with Google in any way. - ”名前” 、”リージョン”、 “ゾーン”、”マシン構成” を入力および選択。以下に設定例を示す。適宜システムの必要構成に応じて修正。
- 名前: 任意の名前
- リージョン: us-west1 (無料枠利用のため)
- ゾーン: 一台構成であれば何を選択しても良い
- マシン構成: 以下の例では、N1 – f1-micro を設定しているが、2021/8以降、無料枠利用するためには E2 – e2-micro を設定する必要がある
Google and Google Cloud Platform™ are trademarks of Google LLC and this website is not endorsed by or affiliated with Google in any way.
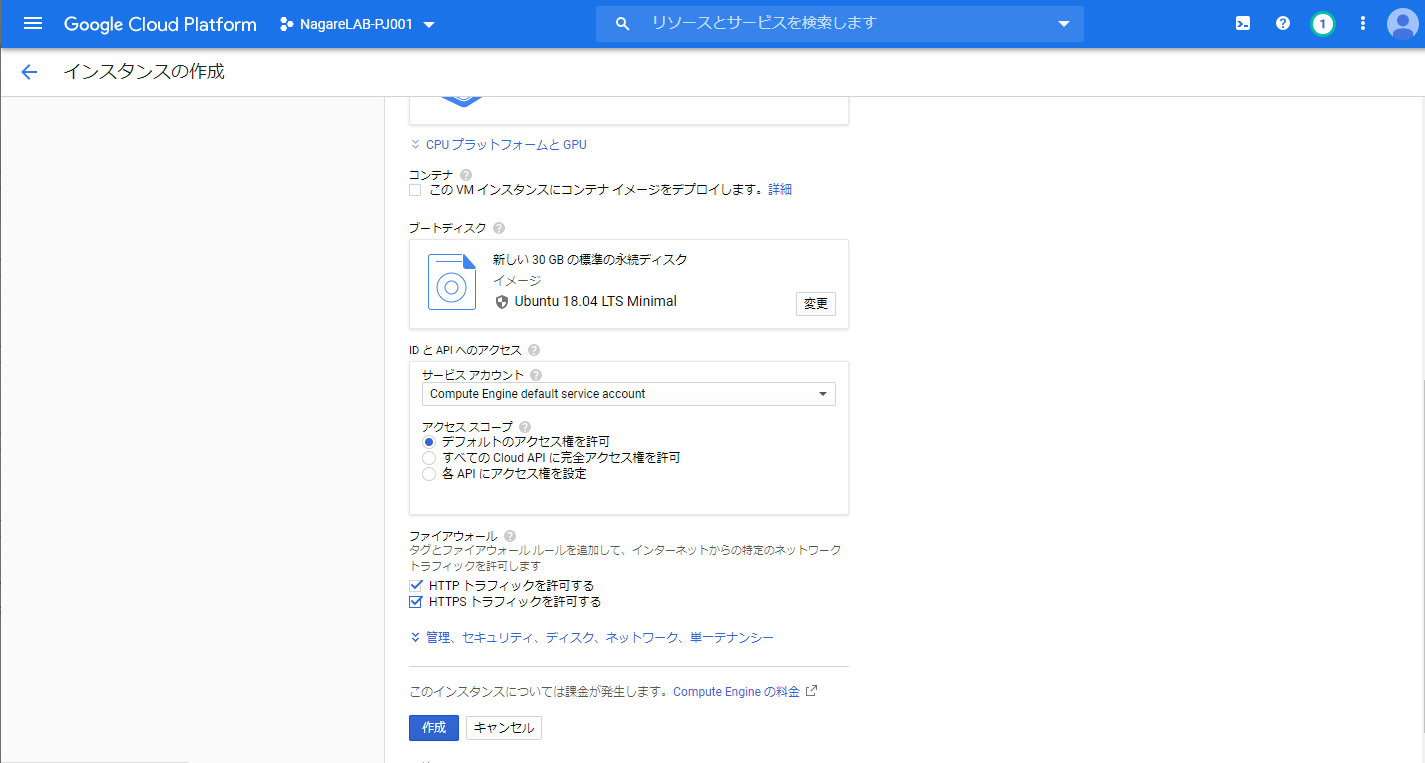
- ”ブートディスク” の “変更” をクリック。
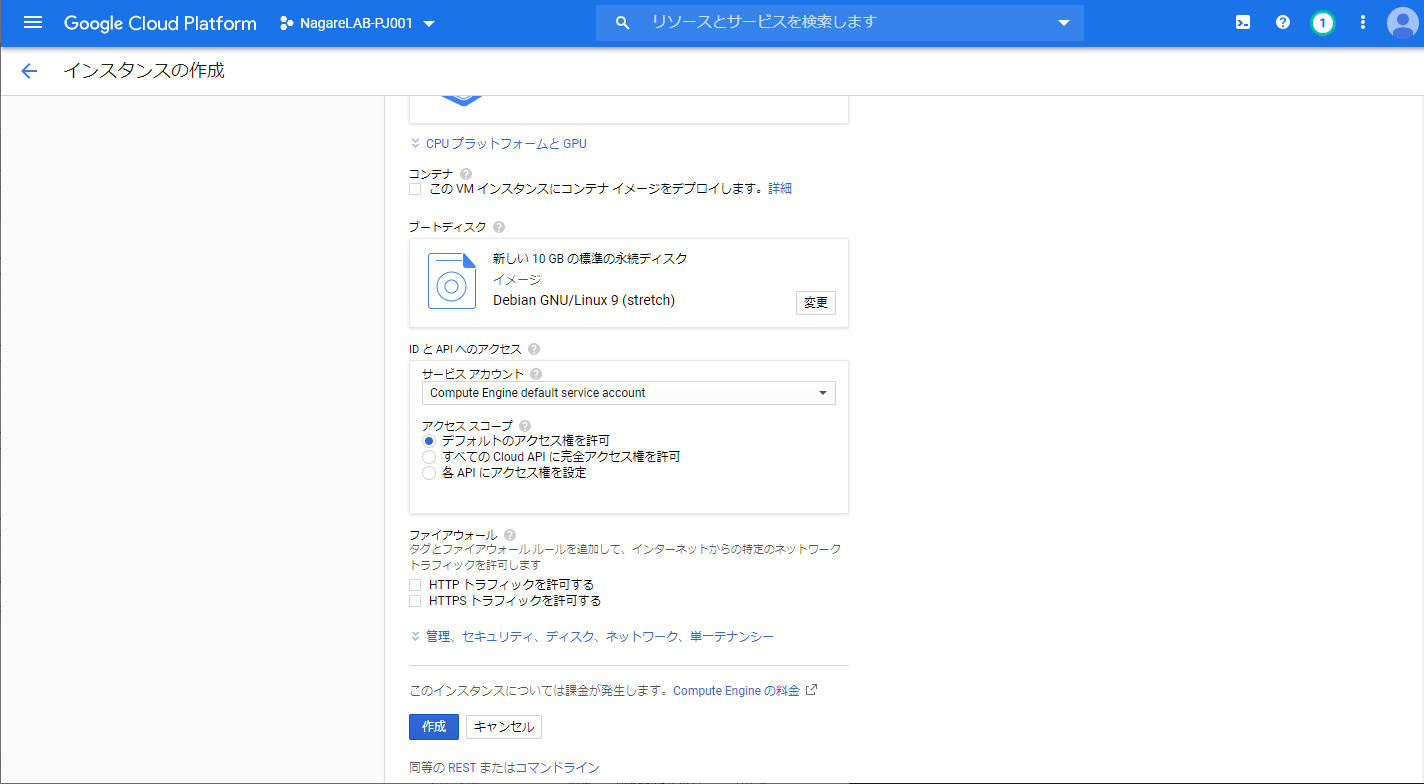
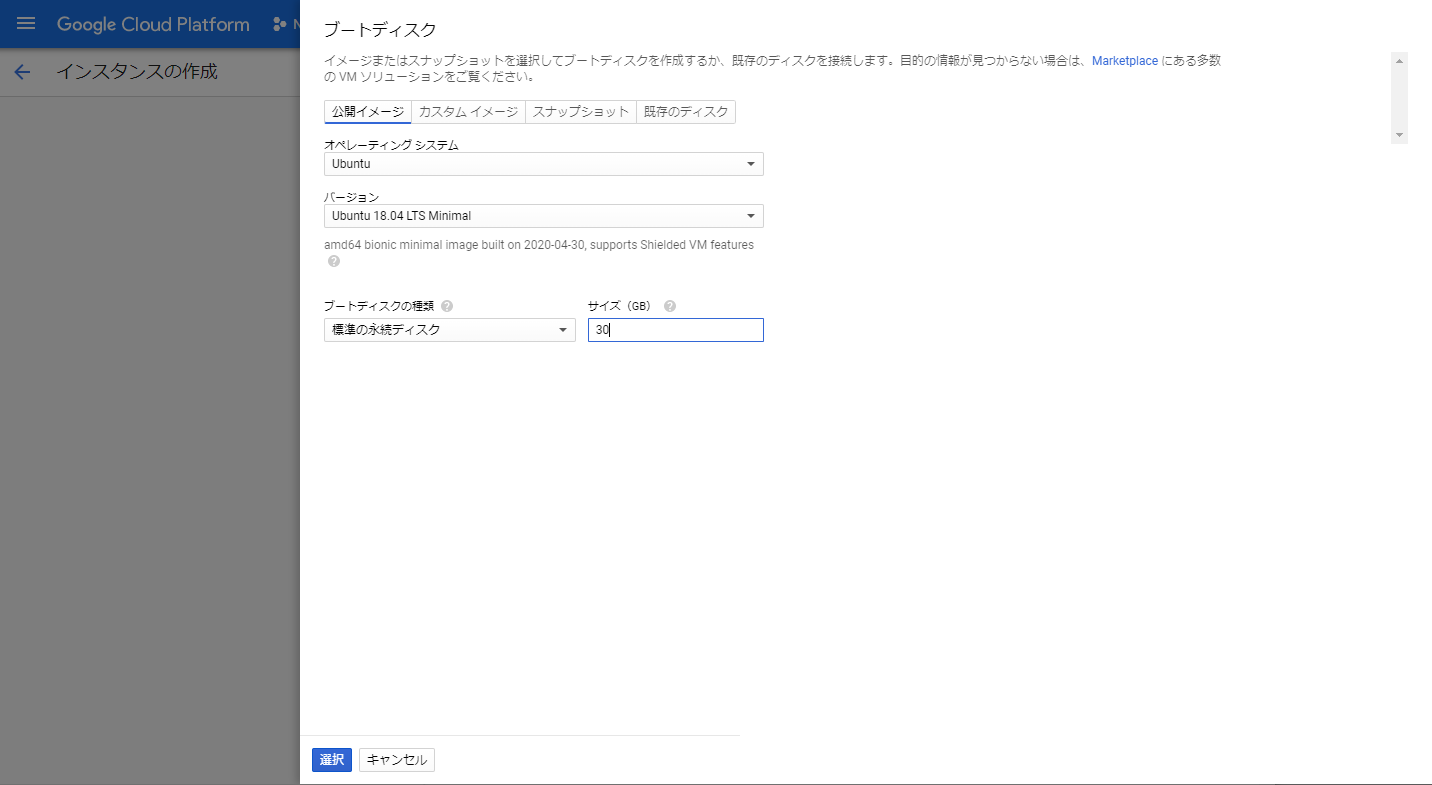
Google and Google Cloud Platform™ are trademarks of Google LLC and this website is not endorsed by or affiliated with Google in any way. - ”ブートディスク” の選択画面が表示される。本画面にてディスクのサイズやインストールしたいOSを選択する。
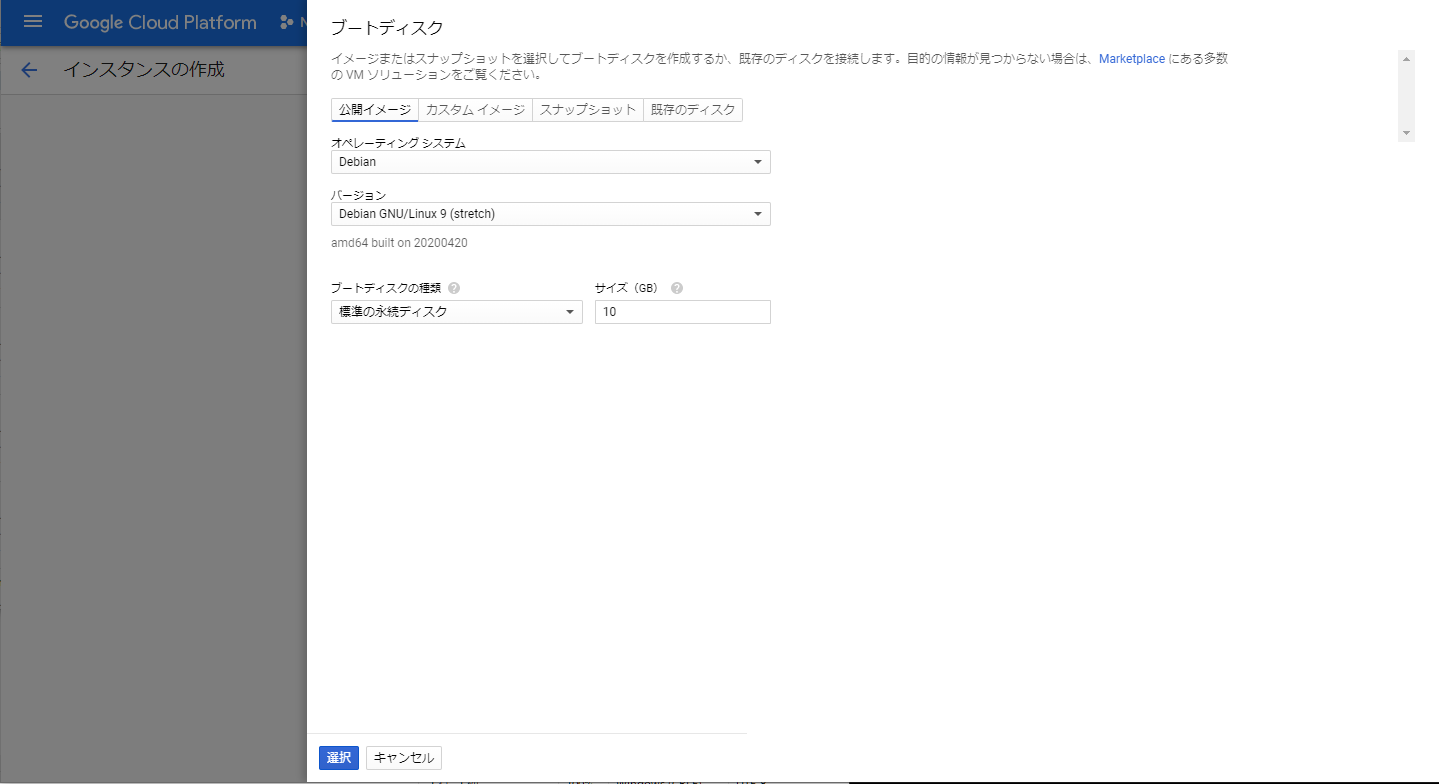
Google and Google Cloud Platform™ are trademarks of Google LLC and this website is not endorsed by or affiliated with Google in any way. - ”公開イメージ” タブの ”オペレーション システム” 、”バージョン”、 “ブートディスクの種類”、”サイズ” を選択。以下に設定例を示す。適宜システムの必要構成に応じて修正。
- オペレーション システム: Ubuntu
- バージョン: Ubuntu 18.04 LTS Minimal
- ブートディスクの種類: 標準の永続ディスク
- サイズ (GB): 30 (無料枠での最大値)
- 必要な設定を選択したら、”選択” をクリック。
Google and Google Cloud Platform™ are trademarks of Google LLC and this website is not endorsed by or affiliated with Google in any way. - “ファイアウォール” 項目の “HTTP トラフィックを許可する”、 “HTTPS トラフィックを許可する” は、本IaaSにてWeb公開等を考えている場合はチェックする。特にWebへ公開する用途のサーバではないのであればオフにしておく。
- “管理、セキュリティ、ディスク、ネットワーク、単一テナンシー” をクリックすると、ネットワーク等の詳細設定が可能である。本手順では特に変更しない。
- 最後に “作成” をクリック。
Google and Google Cloud Platform™ are trademarks of Google LLC and this website is not endorsed by or affiliated with Google in any way. - インスタンスの作成が開始される。
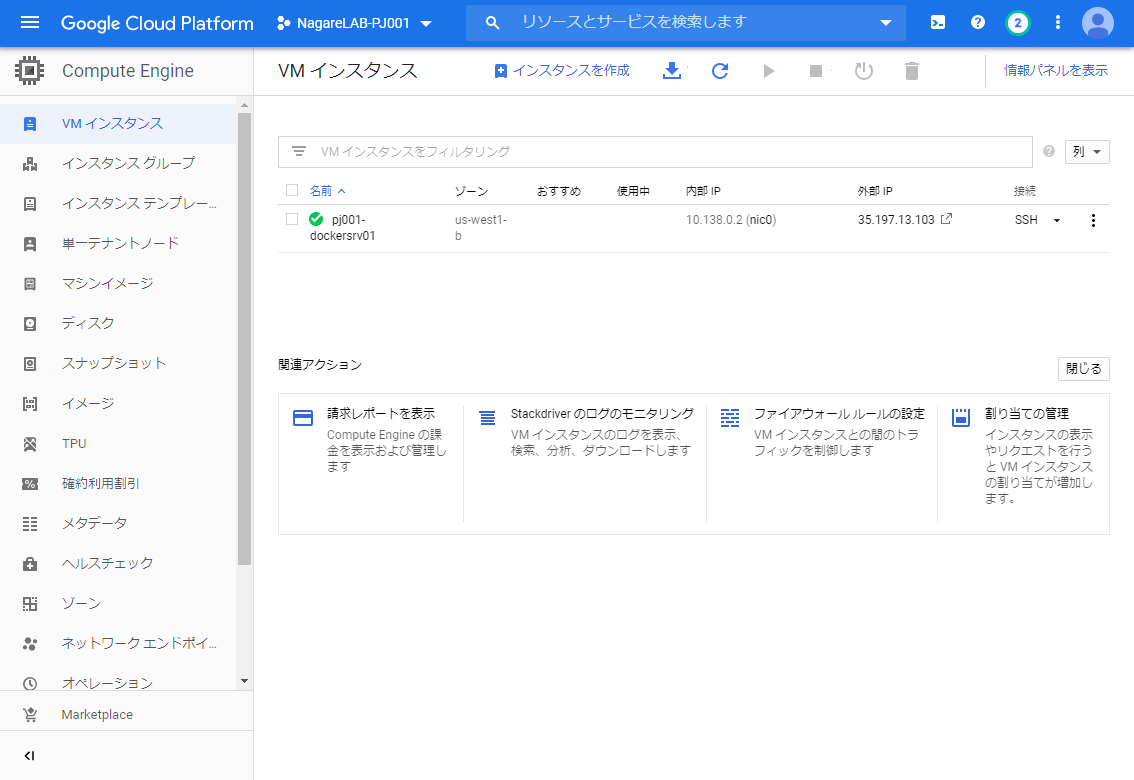
Google and Google Cloud Platform™ are trademarks of Google LLC and this website is not endorsed by or affiliated with Google in any way. - 作成が完了したら、緑色のチェックマークが表示される。
- そのインスタンス行の、 “SSH” をクリックする。
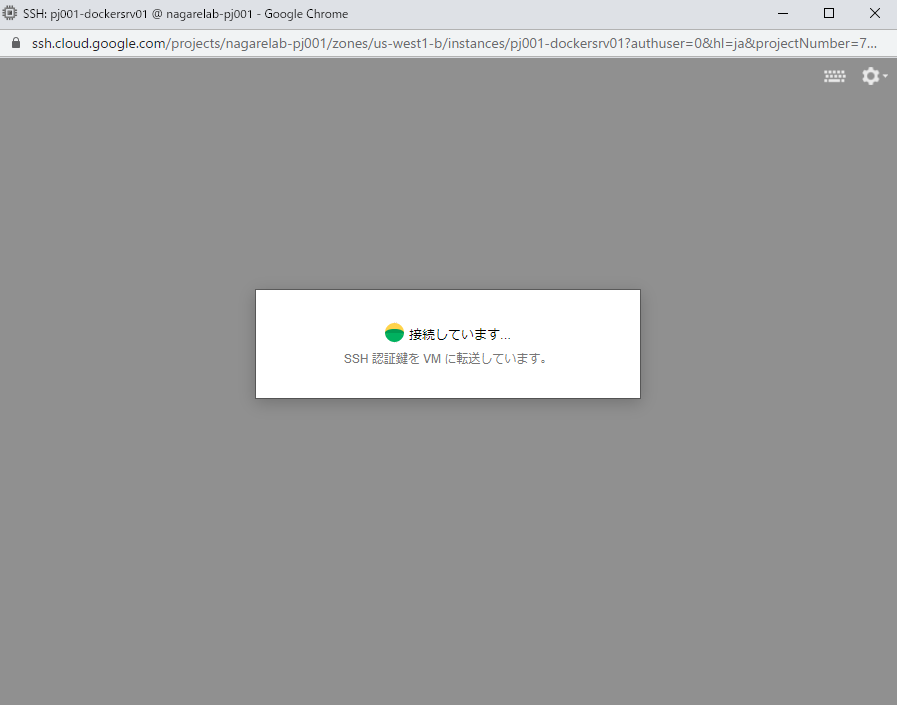
Google and Google Cloud Platform™ are trademarks of Google LLC and this website is not endorsed by or affiliated with Google in any way. - 別のウィンドウが表示されて、SSH接続によりアクセスされたサーバのコマンドプロンプトが表示される。
Google and Google Cloud Platform™ are trademarks of Google LLC and this website is not endorsed by or affiliated with Google in any way.
以上にて、GCEの作成が完了となる。サーバへログインし必要な設定等を実施して利用する。
Linux の初期設定
利用するOSにもよるが、デフォルトでOSの自動アップグレードがオンになっている場合がある。本手順の例としてあげたUbuntuではオンになっている。
アップグレード内容にもよるが自動で再起動してしまう場合があり、Webサイト用など無停止前提のサーバにおいては停止した方が良い。
OSの自動アップグレードを停止する場合は以下ナレッジを参照する。
また、無料枠のGCEを利用するには “e2-micro” を利用する必要があるが、これを利用する場合はメモリが1GBしか搭載されておらず、メモリ不足によりサーバが停止するケースが多々ある。そのため、スワップ設定を実施した方が良い。本手順は別ナレッジにて記載する。
Sponsored Links